Docker Networking Explained: Bridge, Host, Overlay, and None
Understand Docker's four network drivers -- bridge, host, overlay, and none. Learn how container DNS resolution works, when to use each driver, and how port mapping actually functions.
Infrastructure engineer with 10+ years building production systems on AWS, GCP,…
Pick the Row That Matches You
Most Docker networking problems are not debugging problems -- they are "you picked the wrong driver six months ago and now you cannot unpick it" problems. Before you touch a docker run, find your situation in this table and use the matching driver.
| Your situation | Driver | Why | Latency overhead vs host |
|---|---|---|---|
| Dev laptop, docker-compose with 3-5 services | User-defined bridge (auto from Compose) | DNS by service name, clean isolation, no NAT gymnastics | ~40-60 us per round-trip |
| High-throughput API on a single Linux host (Redis, PostgreSQL, Nginx edge) | host | Zero NAT, direct kernel socket access, keeps every microsecond | Baseline (~1% overhead) |
| Multi-host Swarm cluster without Kubernetes | overlay | VXLAN tunnels cross-host communication with encryption support | ~80-120 us per round-trip |
| Batch job that just reads a volume and writes output | none | Zero attack surface, eliminates accidental egress | N/A (no networking) |
| Containers need their own routable IP on the physical LAN | macvlan | Near-native performance, each container looks like a physical host | ~5-10 us per round-trip |
| Kubernetes (any flavour) | Use the CNI, not Docker drivers | Docker's networking is irrelevant -- Calico, Cilium, or Flannel own the namespace | Varies (2-10 us for eBPF) |
The rest of this article explains why each row makes sense, how to actually set it up, and the surprises each driver hides. If you already spotted your row above, skip to the matching section. If you are not sure, default to a user-defined bridge and come back when you have a concrete performance or topology reason to change.
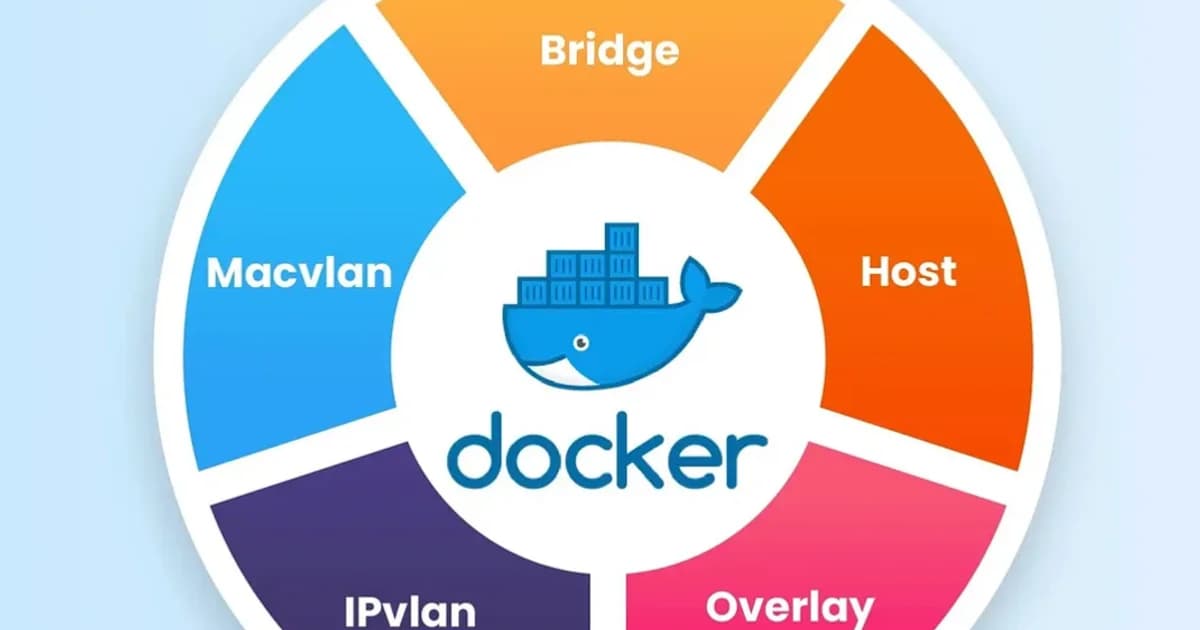
The Four Built-in Drivers Compared
| Driver | Isolation | Cross-Host | DNS | Use Case |
|---|---|---|---|---|
| bridge | Container-level | No | User-defined only | Single-host dev/prod |
| host | None (shares host) | No | Host resolver | Maximum throughput |
| overlay | Container-level | Yes (Swarm/manual) | Yes | Multi-host clusters |
| none | Full (no networking) | No | No | Batch jobs, security |
Definition sidebar: Docker networking is the subsystem that manages network namespaces, virtual ethernet pairs (veth), bridges, and iptables NAT rules to give each container an addressable, isolated -- or intentionally shared -- view of the network. The driver is the plugin that decides how that plumbing is assembled; the four built-ins (bridge, host, overlay, none) cover 95 percent of production deployments.
Bridge Network: The Default and Its Gotchas
Every Docker installation creates a docker0 bridge interface. Containers attached to it get an IP from the 172.17.0.0/16 subnet by default. They can reach each other by IP, and they reach the internet through NAT on the host.
Here's the catch: the default bridge does not provide automatic DNS resolution. If you have two containers on the default bridge, they can ping each other by IP, but ping my-api will fail. This is the single biggest source of confusion for newcomers.
User-Defined Bridge Networks
A user-defined bridge fixes this. Containers on a user-defined bridge get automatic DNS resolution by container name. They're also isolated from containers on other networks.
# Create a user-defined bridge
docker network create my-app-net

# Run two containers on it
docker run -d --name api --network my-app-net node:20-alpine
docker run -d --name web --network my-app-net nginx:alpine

# From the web container, "api" resolves to the container's IP
docker exec web ping api
Pro tip: Always create a user-defined bridge for your application stack. The default bridge is legacy behavior. User-defined bridges give you DNS, better isolation, and the ability to connect/disconnect containers at runtime without restarting them.
How Bridge DNS Resolution Works
Docker runs an embedded DNS server at 127.0.0.11 inside every container on a user-defined network. When a container looks up another container's name, this embedded resolver responds with the target container's IP on that network. If the name doesn't match any container, the query falls through to the host's DNS.
Host Network: Bypassing the Network Stack
The host driver removes network isolation entirely. The container shares the host's network namespace -- same IP, same interfaces, same port space. There's no NAT, no port mapping, no bridge.
# Container binds directly to host port 80
docker run -d --network host nginx:alpine
When to Use Host Networking
- Performance-critical workloads -- eliminating the veth pair and NAT saves measurable latency. Benchmarks show 2-5% throughput improvement for high-packet-rate services.
- Containers that need to see all host traffic -- monitoring agents, network sniffers, service discovery daemons.
- Port-heavy services -- if your app listens on dozens of ports (like an FTP server), host mode avoids mapping each one.
Watch out: Host networking only works on Linux. On Docker Desktop for Mac and Windows,
--network hostdoesn't behave the same way because Docker runs inside a Linux VM. Your container still won't bind to your Mac's interfaces directly.
Overlay Network: Multi-Host Communication
The overlay driver creates a distributed network that spans multiple Docker hosts. It uses VXLAN encapsulation to tunnel container traffic across the underlying host network. This is what Docker Swarm uses internally, and you can also create overlay networks manually.
# Initialize Swarm (required for overlay)
docker swarm init

# Create an overlay network
docker network create --driver overlay --attachable my-overlay

# Services on different hosts can now communicate by name
docker service create --name api --network my-overlay my-api:latest
docker service create --name worker --network my-overlay my-worker:latest
Overlay vs Kubernetes Networking
If you're running Kubernetes, you won't use Docker overlay networks. Kubernetes has its own networking model where every Pod gets a routable IP, and CNI plugins (Calico, Cilium, Flannel) handle cross-node communication. Docker overlay is relevant for Swarm deployments or standalone multi-host Docker setups.
None Network: Complete Isolation
The none driver gives the container a loopback interface and nothing else. No external connectivity, no DNS, no bridge. The container is a network island.
docker run -d --network none alpine sleep 3600

# This container cannot reach anything
docker exec <container-id> ping 8.8.8.8  # fails
When None Makes Sense
- Batch processing -- jobs that read from a mounted volume, process data, and write results back. No network needed, no attack surface.
- Security-sensitive computation -- cryptographic operations, secret generation, anything where you want zero chance of network exfiltration.
- Testing -- verifying that your app handles network unavailability gracefully.
Port Mapping: EXPOSE vs -p
This is another area where confusion runs rampant. The EXPOSE instruction in a Dockerfile and the -p flag in docker run are completely different things.
| Mechanism | What It Does | Opens a Port? |
|---|---|---|
EXPOSE 3000 | Documents that the container listens on 3000 | No |
-p 8080:3000 | Maps host port 8080 to container port 3000 | Yes |
-P | Maps all EXPOSE'd ports to random host ports | Yes |
Pro tip: Always include
EXPOSEin your Dockerfile even though it doesn't publish ports. It serves as documentation for anyone reading the image, and tools likedocker-composeand reverse proxies use it for service discovery.
How to Map Ports Correctly
- Specify the bind address when you don't want to expose to all interfaces:
-p 127.0.0.1:8080:3000 - Use the same port for simplicity in development:
-p 3000:3000 - Avoid conflicts by letting Docker pick the host port:
-p 3000(Docker assigns a random high port) - Map UDP explicitly if needed:
-p 53:53/udp
Container DNS Resolution: How Containers Find Each Other
Step-by-Step DNS Lookup in Docker
- Container A calls
getaddrinfo("api") - The request goes to the embedded DNS resolver at
127.0.0.11 - Docker checks if "api" matches any container name or network alias on the same user-defined network
- If found, Docker returns the container's IP address on that network
- If not found, Docker forwards the query to the host's configured DNS servers
- Container A connects to the resolved IP
Network Aliases
You can give a container multiple DNS names using --network-alias:
docker run -d --name api-v2 --network my-app-net --network-alias api my-api:v2Now both api-v2 and api resolve to this container. This is useful for blue-green deployments -- point the alias at whichever version is live.
Pricing and Tool Recommendations
Docker networking itself is free, but your infrastructure choices affect cost:
| Tool / Service | Cost | Best For |
|---|---|---|
| Docker Engine (CE) | Free | Single-host bridge/host networking |
| Docker Desktop (Business) | $24/user/month | Teams needing managed desktop experience |
| AWS ECS with awsvpc | Per-task ENI (no extra charge) | Native VPC networking per container |
| Cilium (CNI) | Free (OSS) / Enterprise pricing | Advanced eBPF-based networking in K8s |
| Calico | Free (OSS) / Tigera pricing | Network policy enforcement at scale |
Failure Modes: What Breaks in Production
Docker networking has specific pathologies that masquerade as application bugs. These are the ones I have misdiagnosed, so you do not have to.
docker0 Subnet Collision With the VPC
Docker's default 172.17.0.0/16 bridge subnet frequently overlaps with AWS VPCs that use the 172.16.0.0/12 range, or corporate VPN ranges. Traffic to an internal service inside the VPC gets NATed to a container, or vice versa, and neither party can see the other. Fix: change the bridge CIDR in /etc/docker/daemon.json with "bip": "10.201.0.1/16".
iptables -F Wipes Docker NAT Rules
A well-meaning admin runs iptables -F to flush a stuck rule, and instantly every container loses outbound connectivity. Docker installs its own DOCKER and DOCKER-USER chains; flushing them takes down the whole network. Restart the Docker daemon (systemctl restart docker) to rebuild the rules.
conntrack Table Overflow
At high connection rates (tens of thousands per second), the host's netfilter connection tracker fills up and new flows drop silently. The smoking gun is nf_conntrack: table full, dropping packet in dmesg. Raise net.netfilter.nf_conntrack_max to 1 million or switch to host networking.
DNS Takes 5 Seconds Randomly
Alpine-based images ship musl libc, which does not parse /etc/resolv.conf's options single-request-reopen the same way glibc does. Under certain DNS-over-UDP timeouts, every resolution hits a 5-second fallback. Switch to a Debian-slim base image or explicitly set DNS servers in the container via --dns 1.1.1.1 --dns 8.8.8.8.
Port Already Allocated After Crash
A container crashes with an orphaned port mapping; a fresh docker run -p 8080:80 returns "port is already allocated." Docker's userland proxy held the socket but the container is gone. Fix: systemctl restart docker, or disable the userland proxy entirely with "userland-proxy": false in daemon.json (also ~20% faster at port forwarding).
Frequently Asked Questions
What is the difference between bridge and host network in Docker?
Bridge creates an isolated network namespace with its own IP and uses NAT for external access. Host removes isolation entirely -- the container shares the host's IP and port space. Bridge is safer and more flexible; host gives better raw performance but means port conflicts are possible between containers.
Can containers on different bridge networks talk to each other?
Not by default. Containers on separate bridge networks are isolated. You can connect a container to multiple networks using docker network connect, which gives it an interface on each network. This is the correct way to let a container act as a bridge between two isolated networks.
Why can't my containers resolve each other by name?
You're probably on the default bridge network. Automatic DNS resolution only works on user-defined bridge networks. Create a network with docker network create and attach your containers to it. Container names and network aliases will then resolve automatically.
Is Docker overlay network the same as Kubernetes networking?
No. Docker overlay uses VXLAN to create a flat network across Swarm nodes. Kubernetes uses CNI plugins (Calico, Cilium, Flannel) that implement a different model where every Pod gets a unique, routable IP. If you're running Kubernetes, you don't configure Docker overlay networks.
Does EXPOSE in a Dockerfile actually open a port?
No. EXPOSE is purely documentation metadata. It tells users and tooling which ports the container expects to use. To actually make a port accessible from outside the container, you must use the -p flag at runtime. The -P flag publishes all EXPOSE'd ports to random host ports.
How do I debug Docker networking issues?
Start with docker network inspect <network-name> to see connected containers and their IPs. Use docker exec <container> ping <target> to test connectivity. For deeper issues, run docker exec <container> nslookup <name> to check DNS resolution. On the host, iptables -L -t nat shows Docker's NAT rules.
Should I use Docker Compose networks or create networks manually?
Use Compose networks. Docker Compose automatically creates a user-defined bridge for each project and attaches all services to it. Services can reach each other by their Compose service name. Manual network creation is only needed for cross-project communication or advanced topologies.
Conclusion
Pick bridge (user-defined) for 90% of workloads. Use host only when you've measured a real performance bottleneck. Use overlay for multi-host Swarm deployments. Use none when you genuinely need zero network access. And always, always use user-defined bridges instead of the default -- automatic DNS alone makes it worth the extra line of configuration.
Written by
Abhishek Patel
Infrastructure engineer with 10+ years building production systems on AWS, GCP, and bare metal. Writes practical guides on cloud architecture, containers, networking, and Linux for developers who want to understand how things actually work under the hood.
Related Articles
Multi-Cluster Kubernetes: Argo CD ApplicationSet Patterns
When 10+ clusters or 50+ services break hand-written GitOps. ApplicationSet's four generators (cluster list, Git directory, PR, cluster decision), real production patterns (env promotion, per-tenant, multi-region failover, preview envs), and the sharp edges (template debugging, cascading mistakes, RBAC).
11 min read
SecurityBest Vulnerability Scanners for Containers (2026): Snyk vs Trivy vs Grype vs Aqua
Benchmarked comparison of Snyk, Trivy, Grype, and Aqua against 100 production images. Real 2026 pricing, false-positive rates, scan times, and a decision matrix for picking the right scanner.
15 min read
ContainersKubernetes GPU Scheduling: DRA, KAI Scheduler, MIG
Dynamic Resource Allocation replaced device plugins for GPU claims in Kubernetes 1.34. KAI Scheduler adds gang scheduling and queues. MIG slices H100s into 7 isolated tenants. Full production setup with the NVIDIA GPU Operator, topology-aware training, and when to use MIG vs MPS vs time-slicing.
17 min read
Enjoyed this article?
Get more like this in your inbox. No spam, unsubscribe anytime.